Showing posts with label nursery. Show all posts

Dec 9, 2010

Adelaide's Room: Finished!

I'm finally done with the little girl's room! I put finishing touches on it this morning, and breathed a sigh of relief knowing that whenever she decides to come, I don't have to worry about working on this room anymore! I am absolutely in love with every bit of it, and now I just wish that all our rooms looked this good! :)

[Entering the room. Rug from IKEA.]

[Bookshelves made from a vinyl gutter. New vibrating seat was a $5 Goodwill find!]

[Bamboo blinds from Lowe's. Curtains from IKEA. Wooden bike from Goodwill.]

[Shelves I've had for years.]

[Dresser from IKEA, with new knobs and changing pad on top. Cloth diapers, covers, handmade wipes, etc. are in the top drawer, while clothes are in the other two drawers. Wet pail to the left of the dresser. Tall mirror hung low so Adelaide can use it when she gets older. Dandelion decals from Target.]

[Mobile I made, inspired by the one found here.]

[This will be Adelaide's view when she's getting her diaper changed.]

[Closet doors, and door into room.]

[Martha Stewart alphabet cards. I love the vintage feel.]

[Knobs on closet doors, found at Hobby Lobby.]

[Gulliver crib from IKEA. $0.99 sheet from Goodwill.]

[Crochet blanket was a gift from a friend. I made the owl years ago, and the kitty is IKEA.]

[I made this bunting that hangs over the crib. If you flip it over, the other side says "I love you".]

[Closeup of the bunting. Both of these fabrics are being used in the quilt I'm making her.]
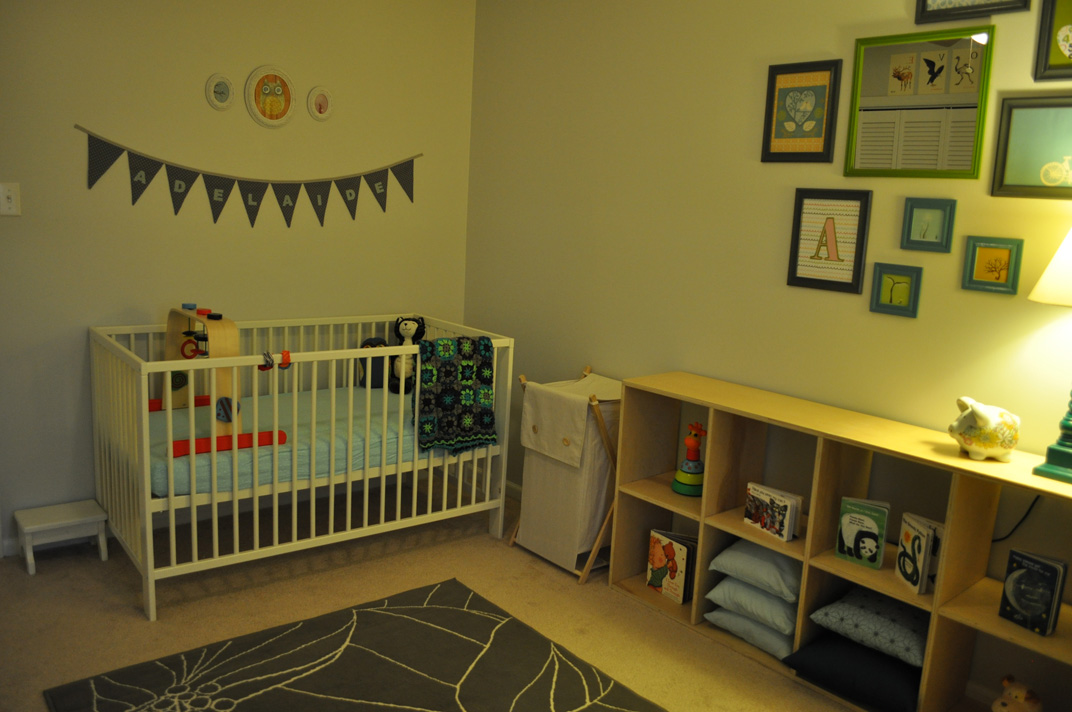
[Crib/bookcase corner.]

[Frame collage over bookcase. I made the paper collages in the five gray frames using scrapbook paper.]

[Hubby and I made this bookcase out of birch plywood. We put it together using dowel rods and no screws! We are very proud of it. It's very sturdy and stable, and will last years.]

[$5 piggy bank from Target, no longer sold.]

I can't wait to put little Adelaide in her room! I think it's made well enough so that it will grow with her. The crib converts into a toddler bed and will most likely stay where it is. The bookcase of course can hold so much more than it is now (we just don't have many toys yet). Books can be switched out in the gutter bookshelves. The changing pad can be removed and little girly things can be placed on top. And the closet is still practically empty and can hold tons.

I'm so happy with the way this room turned out! Total cost was around $500, but that includes all the big furniture, the wood to make the bookcases, and the tons we spent in paint samples! Not bad for a room that started off beige all over and completely different!

Nov 18, 2010

Quilt for Adelaide, part #1

I've set out to make a quilt for my baby girl.  I've never made a quilt before, but I saw this and decided I had to make one.  I think there's something endearing about a mother taking the time to make something for her child (at least, that's what I hope Adelaide will think!).  I'm sure there will be some snags in the road, but so far it's looking good. :)

I spent any free time I had at school/work cutting out the pieces.  In total there are 288 bits, but there are more that need to be cut (I'm thinking I need to add some rectangular pieces to finish out the edging, but I can share all that later!).

[Here are all the pieces stacked together.  It doesn't look like much, does it?]


[And fanned out so you can get an idea of the colors.  The lighting isn't the best in this photograph as it was taken with Kevin's cellphone, but you get the idea.  The really light piece on the right is actually a light turquoise.]


[I laid it all out (all 288 pieces) to figure out color placement.  I'm glad I did that because there ended up being a lot of switching things around until I was happy with what I had.  Again, the lighting isn't the best, but you get the idea!]


[And a close-up of the layout.  I love all these fabrics.  Some of them I've had forever (like the dark blue and the dark teal ones) but some of them are newer purchases from Hancock Fabrics... nothing special but it will match Adelaide's room very well!]

More updates on the quilt coming soon!

Nov 16, 2010

Clothes on the Line

All the clothes are washed, dried, and put away.  Despite the mountain of pink, I have fallen in love with the little footie pajamas, the teeny tiny shirts, and the zip-up jackets for our smallest people.  Even Kevin got all gooey after seeing all this on the line.  


I've organized her dresser and gotten everything into their little compartments.  A space for the socks, a space for the nighties, a space for the pants.  One drawer for newborn-sized clothing, and another for 0-3 months, just in case she doesn't fit into the newborn sizes.  (Or in case she grows out of them super fast.)

Everything else is separated by size into bins in her closet, labeled with a gray marker to match the room.  6-9 months, 12 months, 18 months, 24 months/2T, 3T and older.  I've gotten a lot of hand-me-downs.  Our girl will be well-dressed for at least the first 2 years!  I'm just lacking in the 3-6 month department, but we'll make it work.

Last night was a bit overwhelming with piles of clothes on the floor, but now that everything is put away I feel much better.  I've picked out 3 choices for her coming-home outfit.  Kevin couldn't even pick a favorite, so we'll have to wait and see what we feel like putting on her when the time comes.  One of the outfits is newborn sized, and the other is in 0-3 months.

I can't wait to dress this little girl!  

Nov 9, 2010

This book's going in the gutter! (Gutter bookshelf, that is...)

While working on Adelaide's room, I was trying to figure out what to do with a wonky-sized corner.  The wall facing the doorway has a window, but the window is not centered (drives me nutty!).  To the right of the window, we have the dresser and wet pail.

To the left, we had a 3-ft span.  I was originally wanting to do some sort of corner bookshelf/bench/cubby thing, but I realized when doing all the measuring and figuring, that the vent would either have to be covered up or blocked.  It is the only vent in the room so that's not an option.  I don't really want Adelaide to freeze in the winter or burn up in the summer.


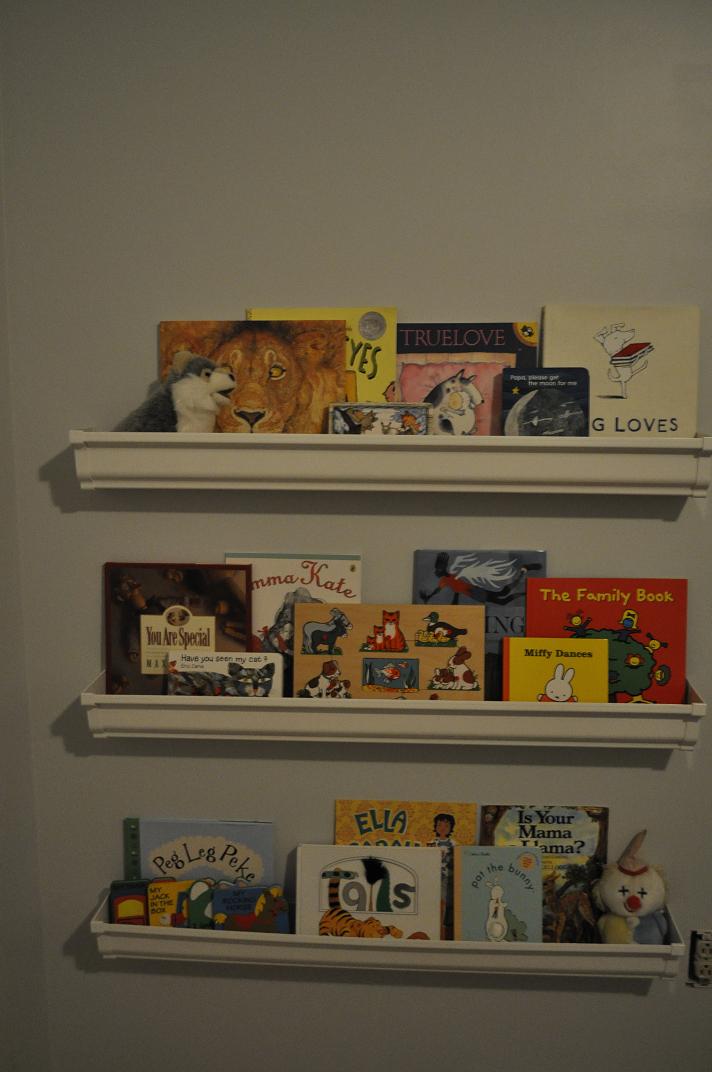
So, after seeing lots of examples of this on other home/mommy/school blogs, I decided to make some bookshelves out of gutters!  I loved the idea for the simplicity of the look, the easiness of the project, and the cheapness of the whole thing.  

For $20, I was able to purchase the 10-ft vinyl gutter and 6 endcaps (3 left and 3 right) to create our three 3-ft long bookshelves.

After cutting them to size, with a bit of scrap left over, I sanded the pvc-like edges clean and attached the end caps.  I caulked along the inside of the caps to make sure they adhered really well and let them dry overnight.

The next day, Kevin and I measured exactly where we wanted them on the wall and found the studs so they would be nice and sturdy.  We predrilled holes in the gutters, and then screwed them into the studs, with a couple of other screws on the ends to add support.

Ta-da!

Adding books makes them look so fantastic, right?!  And the idea behind these gutter bookshelves is that Adelaide will see the fronts of the books, instead of just the spine, therefore being more interested in reading the books.  The first is only 18 inches off the floor, so definitely in her reach, when she gets to moving around.  Nicer books will stay on the top shelf, and Moma will have to pull those down for reading to her :)


We still plan on making another bookshelf/cubby piece of furniture out of birch plywood, but that's still a work-in-progress and will go on the wall to the left of these bookshelves.  This child already has a lot of books, and will surely collect many more (just like me!).

Aug 5, 2010

In which we went overboard on the paint samples...

Choosing a paint color for the nursery was so hard. I know these pictures show only 4 samples on the wall, which really is not that bad (maybe a little). But after these photos came more samples, making a total of 7 different colored squares on that wall. And they were all versions of gray.


Some grays are actually really blue. Some are pretty darn purple. Some are too light, some are too dark. I think I walked into that room a hundred times, each time trying to go in casually as if I were just sauntering in without the premise of picking one of the paint colors.

My favorite was Glidden's Misty Moonstone. It has just a touch of blue, but barely. It really is a good gray. (Grey?)


But it was a pretty similar gray to the one we have in the living room and hallway. I didn't want the seemingly-same gray in the nursery.

(By the way, I wanted a neutral color for the walls, even though we will be finding out the sex - I'm not big on walls being pink for girl and blue for boy... I may have mentioned that before.)

Anyhow, so we took to the Home Depot again, and got two more samples, one in Misty Moonstone 25% lighter, and one 50% lighter.

The 25% lighter version is our final choice! It's perfect. :) I'm so happy - something crossed off the list. My mom comes to visit next week, and I'm going to have her help me paint the room... so exciting!!!