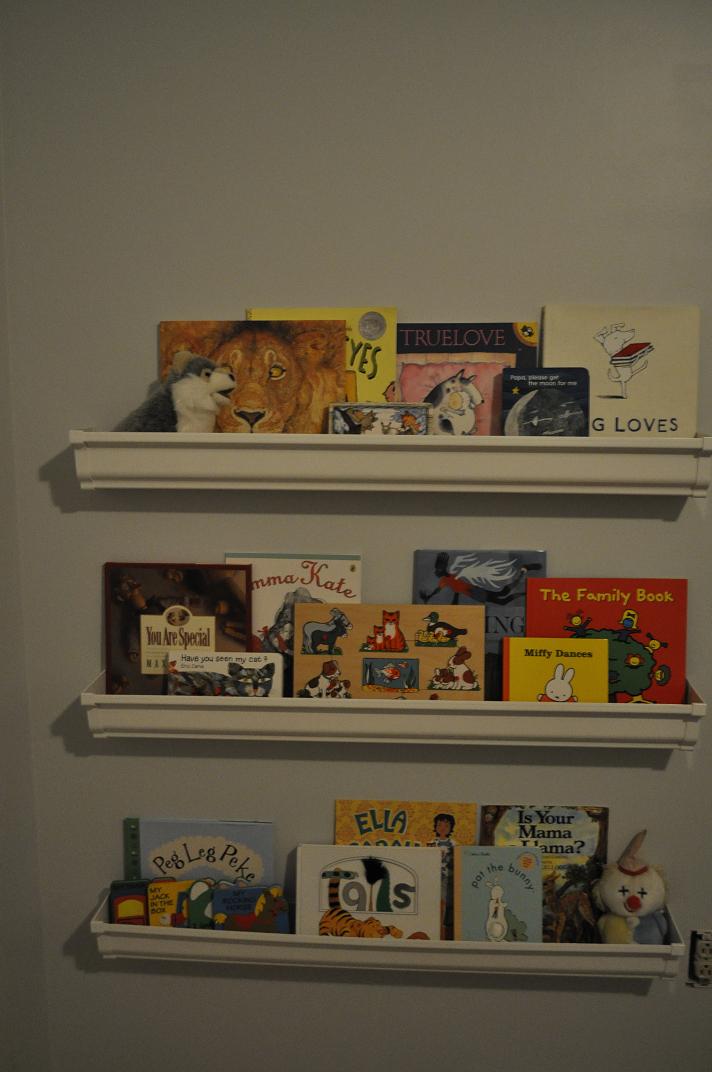
[Bookshelves made from a vinyl gutter. New vibrating seat was a $5 Goodwill find!]
 [Bamboo blinds from Lowe's. Curtains from IKEA. Wooden bike from Goodwill.]
 [Shelves I've had for years.]
 [Dresser from IKEA, with new knobs and changing pad on top. Cloth diapers, covers, handmade wipes, etc. are in the top drawer, while clothes are in the other two drawers. Wet pail to the left of the dresser. Tall mirror hung low so Adelaide can use it when she gets older. Dandelion decals from Target.]
 [This will be Adelaide's view when she's getting her diaper changed.]
 [Closet doors, and door into room.]
 [Martha Stewart alphabet cards. I love the vintage feel.]
 [Knobs on closet doors, found at Hobby Lobby.]
 [Gulliver crib from IKEA. $0.99 sheet from Goodwill.]
 [Crochet blanket was a gift from a friend. I made the owl years ago, and the kitty is IKEA.]
 [I made this bunting that hangs over the crib. If you flip it over, the other side says "I love you".]
 [Closeup of the bunting. Both of these fabrics are being used in the quilt I'm making her.]
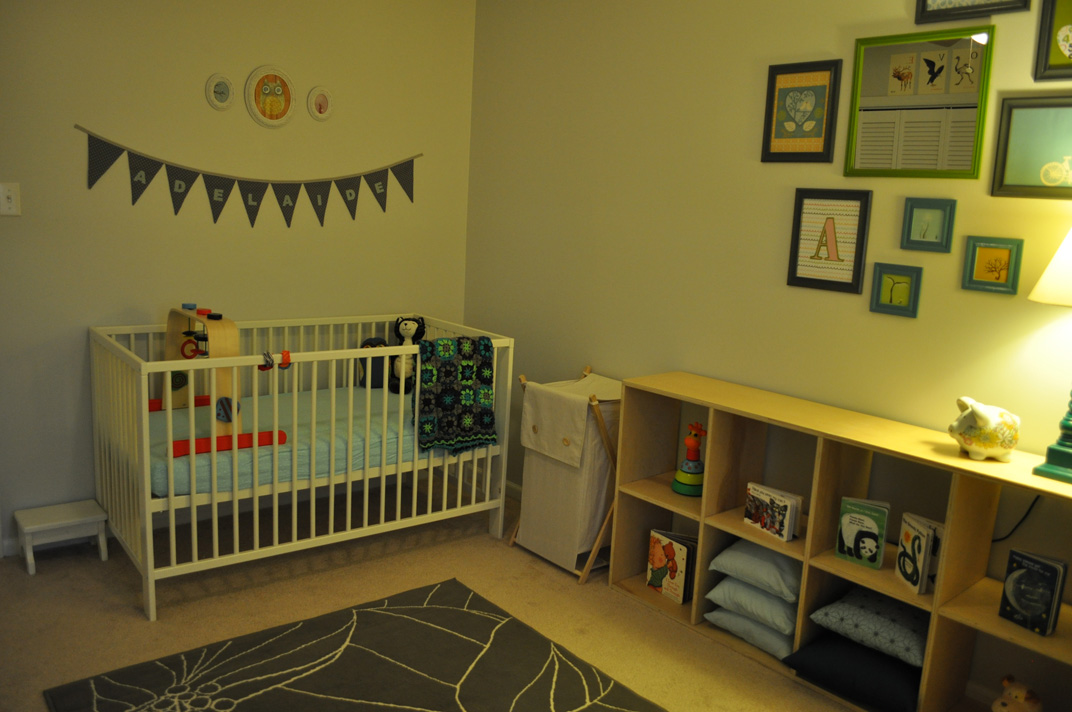 [Crib/bookcase corner.]
 [Frame collage over bookcase. I made the paper collages in the five gray frames using scrapbook paper.]
 [Hubby and I made this bookcase out of birch plywood. We put it together using dowel rods and no screws! We are very proud of it. It's very sturdy and stable, and will last years.]
 [$5 piggy bank from Target, no longer sold.]
I can't wait to put little Adelaide in her room! I think it's made well enough so that it will grow with her. The crib converts into a toddler bed and will most likely stay where it is. The bookcase of course can hold so much more than it is now (we just don't have many toys yet). Books can be switched out in the gutter bookshelves. The changing pad can be removed and little girly things can be placed on top. And the closet is still practically empty and can hold tons.
I'm so happy with the way this room turned out! Total cost was around $500, but that includes all the big furniture, the wood to make the bookcases, and the tons we spent in paint samples! Not bad for a room that started off beige all over and completely different!